
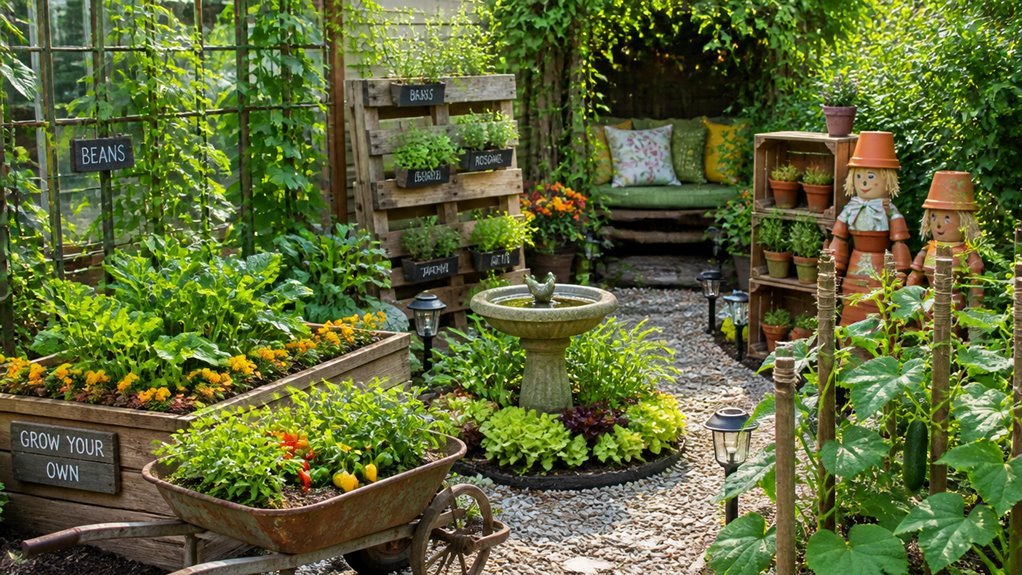
I plan my garden layout for morning light and daily access. Raised beds in cedar or redwood measure 4 feet by 8 feet. Paths stay 24 inches wide for wheelbarrows. I place tall crops north of short ones.
The real question is what you plant inside those frames.
Plan Your Vegetable Garden Layout for Morning Views and Easy Access
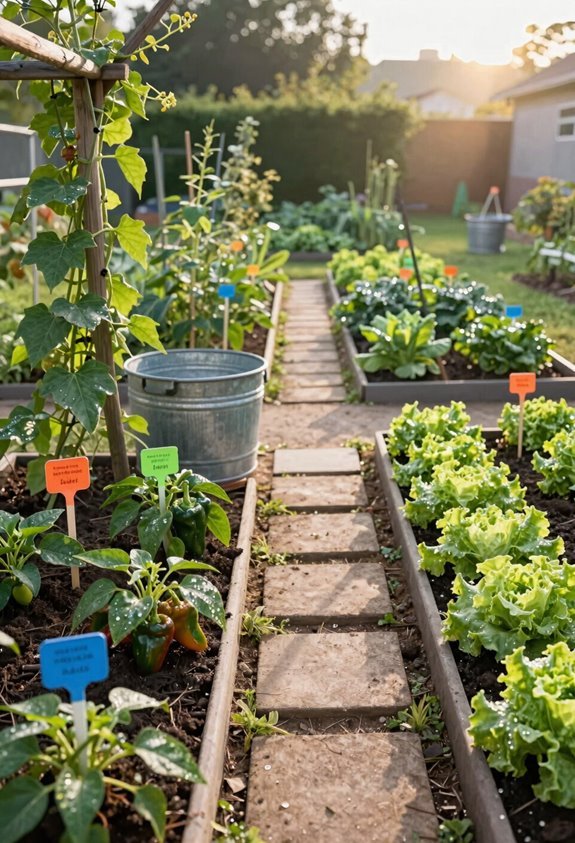
I arrange my vegetable garden in blocks, not rows. I plant salvia, eggplant, basil, cilantro, and green onions in distinct squares. This garden layout creates visual interest from my kitchen window each morning.
Raised Beds Define the Space
I use raised beds to separate planting areas from paths. This structure gives me a clear canvas for arranging crops. I step back before planting to check color contrasts and leaf shapes.
Vertical Elements Add Height
I fit trellises and A-frame supports along block edges. These free ground space for additional crops. Morning light filters through climbing plants along my walkways.
Alternating Crops Simplifies Access
I alternate vegetables within each block. This rhythm makes early harvesting faster. My raised beds keep soil contained and paths firm for daily morning checks.
Build Raised Beds From Lumber, Stone, or Recycled Materials
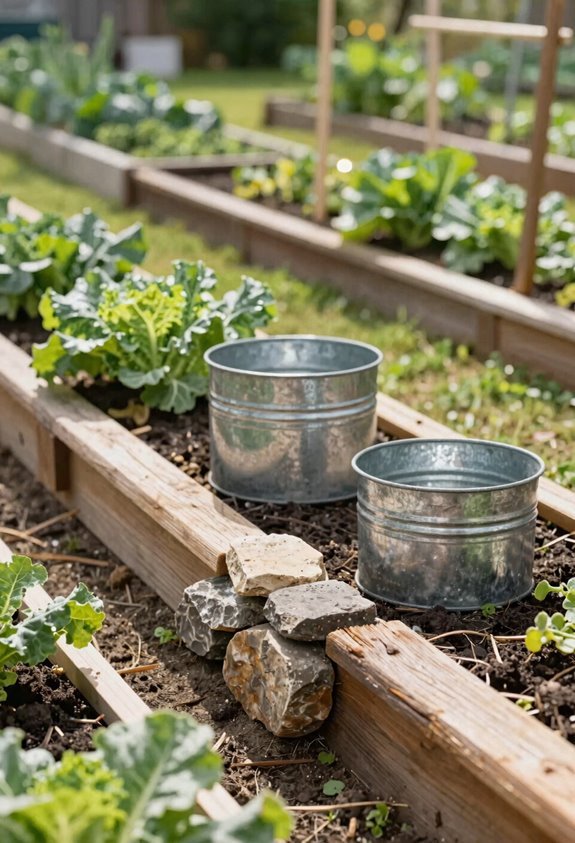
Choose lumber, stone, or recycled materials based on cost and durability. I use cedar or redwood lumber for 4×8 foot beds that last 10-15 years. Stone costs more but stands permanent. Recycled materials like old bricks or salvaged concrete cut expenses and reduce waste.
Raised beds organize my planting blocks. I alternate crops like eggplant, basil, and cilantro for color and texture. These beds elevate my garden from plain utility to designed space.
I pair them with trellises or A-frame supports to add height and free ground area. Defined paths between beds give me stable structure. I paint each bed with plants through the season.
Paint Raised Vegetable Beds in Bold, Weatherproof Colors
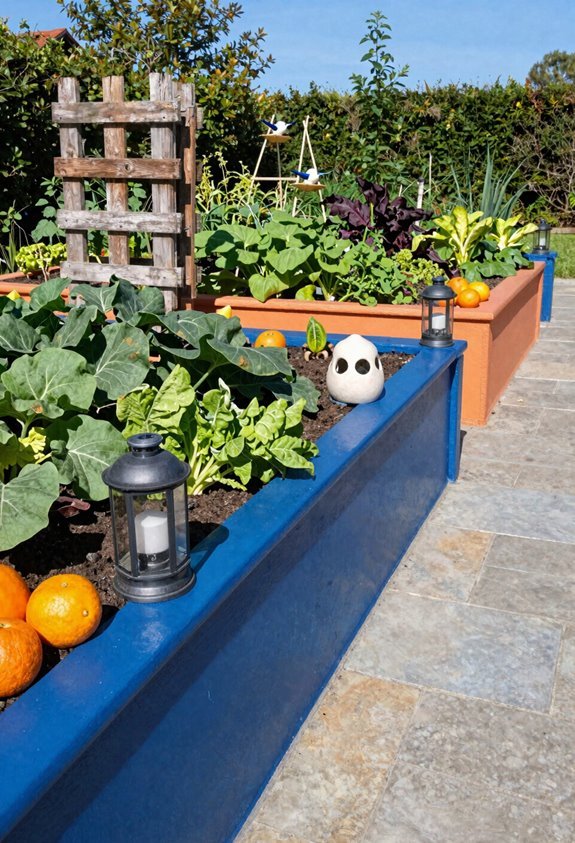
I pick exterior-grade acrylic latex paint rated for wood or composite materials, and I apply two thin coats over a weatherproofing primer. I choose bold hues like deep blue, bright yellow, or purple to create clear contrast against green plants and mark bed boundaries.
I test colors on scrap wood first, and I allow 24-48 hours curing time before exposing painted surfaces to soil or moisture.
Picking Bold Hues
Visual contrast transforms a functional vegetable garden into a designed landscape. I paint raised beds in saturated colors that stand out against green foliage. Deep blues, fiery oranges, and crisp whites define bed edges clearly.
Color-blocking adds structure to single beds. I paint different tiers or sections in distinct hues to separate planting zones. This technique highlights block planting and creates visual rhythm across the garden.
I pair bold bed colors with complementary crops. Purple carrots or eggplants against yellow or orange paint create harmony. Red beds stand out beside silver-leaved herbs.
Test paint on a small area first. Lightfast, UV-resistant finishes prevent fading. A protective topcoat maintains color through multiple seasons.
Weatherproof Paint Choices
Which paint holds up against three seasons of rain and sun? Weatherproof paint stands the test of time. You have options. Let’s break it down.
Exterior-Grade Paints and Deck Stains
I use these on my raised beds. They handle sun, rain, and temperature swings. Wood, stone, or concrete; it doesn’t matter. The color stays put.
Surface Prep and Application
Prime porous surfaces first. Apply two coats of UV-resistant paint. This prevents fading and peeling. One coat won’t cut it.
Repaint Schedules
High-sun beds need touch-ups yearly. Shaded raised beds go two to three years. Plan accordingly.
Color-Coding System
Paint leafy green sections purple. Use warm tones for root crops. This organizes your garden layout. Tending and harvesting stay simple.
Bold blues, rich greens, bright yellows; your beds will stand out. The contrast against your vegetables works every time.
Design Impact Tips
Raised beds painted in weatherproof colors do double duty.
Visual Focus
I pair vivid raised beds with contrasting foliage. This creates striking blocks of color. Crop diversity stands out clearly.
Navigation Aid
I use color to mark bed edges. Pathways become obvious. Maintenance and harvest get easier.
Material Selection
I apply exterior-grade paints with UV resistance. These withstand moisture and sun exposure. The finish lasts multiple seasons.
Color Coding
I assign warm colors to root crops. Cool colors go to leafy greens. This guides my planting rotation.
Personal Style
I treat each bed as garden art. My choices reflect my preferences. The garden feels intentional and unified.
Pairing Technique
I match bold beds with flowers nearby. Seasonal changes stay visible. The design stays dynamic year-round.
Plant Crops in Blocks for Visual Rhythm and Maximum Yield
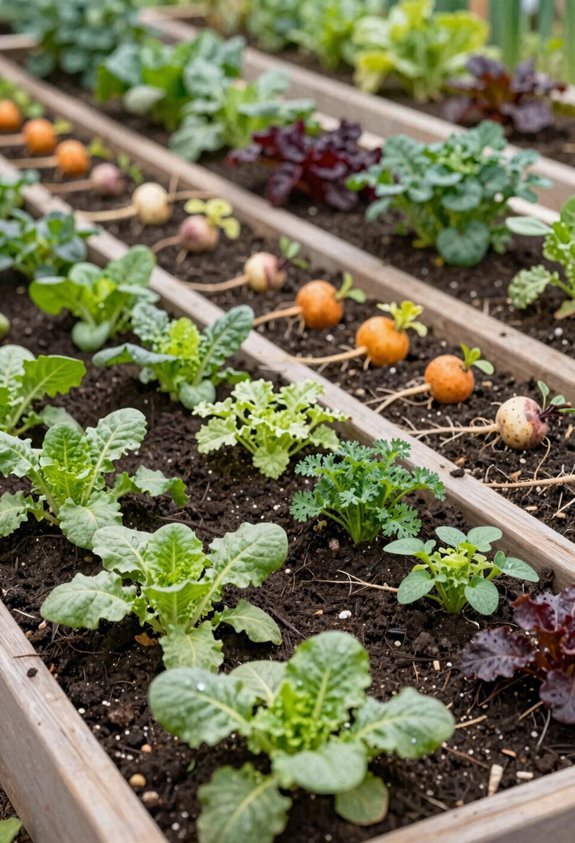
I plant vegetables in square or rectangular blocks instead of long rows to pack more plants into each bed and create a cleaner look.
I group crops by color and leaf shape, placing deep purple eggplant next to bright green basil and feathery cilantro beside upright green onions for contrast. I sketch my layout before planting to check how the blocks flow together. I leave room for trellises or hanging baskets to add height without crowding the ground.
Block Planting Basics
Block planting turns your garden bed into a grid of dense vegetable groups. I arrange crops in compact squares across my raised beds instead of stretching them into long rows. This method gives your garden visual rhythm and squeezes more harvest from every square foot.
Visual Planning
I map my blocks before planting season starts. This lets me see how colors and textures will play together across the bed. You spot problems early and build real garden artistry.
Crop Selection
Beets, carrots, leafy greens, and garlic do well in blocks. I balance these with occasional rows for potatoes, tomatoes, peas, and pole beans. Leave space for staking and walking paths. Your raised beds look organized and productive.
Color Pairing Strategies
Plant crops in blocks for visual rhythm and maximum yield. I use raised beds to create contained color pairing systems that make every square foot count.
Block Planting for Visual Impact
Arrange crops in squares or rectangles, not rows. Alternate heights and types within each bed. I step back before planting to check contrast, texture, and color flow.
Edge Planting and Flower Accents
Plant zinnias, salvia, or rudbeckia along bed edges. These flowers stand out against green foliage and draw the eye through the garden.
Vertical Layers
Add trellises or A-frame supports to raise vines. This frees ground space and builds layered patterns across multiple beds.
I assess each raised bed as a design unit. Color pairing between blocks creates rhythm. Consistent spacing ties the garden together.
Seasonal Layout Planning
Year-round harvests start with timed block rotations. I use block planting to turn my beds into living mosaics that shift with the seasons. I section each bed into defined squares for salvia, eggplant, basil, cilantro, and green onions. This lets me visualize the design before I dig.
I alternate crop heights and types within single beds. Tall trellises and A-frames rise behind low herbs. Hanging baskets free ground space for more blocks.
I reserve bed ends and corners for flowers. I pair purple eggplant with orange marigolds. I check each combination for contrast.
Seasonal layout planning means my garden never looks tired. I swap blocks as crops finish. I maintain visual rhythm through color and texture changes. I maximize every square foot.
Mix Neon and Colorful Vegetable Varieties Into Every Bed

Why settle for plain green when I can turn every bed into a visual statement? I pack my vegetable garden with colors that stand out. Neon purple eggplants sit beside bright orange carrots. White varieties anchor the mix. These high-contrast focal points draw the eye through every row.
I pair these vegetables with complementary flowers like zinnias or salvia. This boosts visual impact and brings pollinators. I plant blocks of purple potatoes, yellow peppers, and white eggplants together. Maximum color variety fills each edible bed.
I use leaf shapes for depth. Dark-leaved kale frames light-colored peppers. I place color-forward crops at bed edges and corners. These create frame-like boundaries. The design guides the eye naturally through the space.
Edge Vegetable Beds With Annual Flowers for Seasonal Contrast
I frame my vegetable beds with annual flowers at corners and ends. I plant zinnias, verbenas, rudbeckias, salvias, and globe amaranth in blocks at bed perimeters. These annual blooms create sharp color contrasts against green vegetable foliage.
I mix flowering annuals into edge beds to guide visual rhythm along boundaries. I reserve bloom-friendly spots at corners and ends to avoid crowding vegetables. I use block planting layouts to emphasize color accents and enhance artistic impact.
I pair flowering annuals with vegetables for complementary displays. I rotate flowering accents seasonally to maintain fresh interest around edge beds. This approach delivers quick, eye-catching color without sacrificing growing space.
Add Vertical Layers With Shepherds Hooks and Hanging Baskets
I use shepherd’s hooks in 24-inch, 36-inch, and 60-inch heights to build vertical layers throughout my vegetable garden. Short hooks hold 6-inch hanging baskets or repurposed teapots for ground-level accents, while tall hooks support 12-inch baskets of trailing tomatoes or herbs at eye level. This setup frees square footage below and creates tiered sightlines that blend functional planting with decorative structure.
Varying Hook Heights
Shepherd’s hooks transform flat garden beds into layered vertical displays with minimal effort. I mix short 24-inch hooks for container gardens with tall 48-inch hooks for dramatic focal points. This creates visual rhythm between ground-level vegetable garden beds and elevated garden decor.
Short hooks work perfectly for whimsical touches near pathways. Tall hooks draw the eye upward and add structure to open spaces. I space hooks 3-4 feet apart to maintain balance.
Galvanized pails or upturned pots mount directly on hooks to add texture. Hanging baskets expand usable space for herbs and greens above ground level. Plan your layout before installing. Position taller hooks toward the back of beds. Place shorter hooks in front where you walk. This layering technique maximizes growing area without sacrificing style.
Hanging Planter Options
Hooks and baskets turn empty air into growing space. I use shepherd’s hooks at 36-inch, 48-inch, and 60-inch heights to build vertical decor that draws the eye upward. Each hanging planter holds small pots or vintage teapots for texture and color variation.
Shepherd’s Hook Arrangement
Space hooks 24 inches apart in rows. Suspend baskets at staggered heights to create cascading layers. This method frees ground space for other plantings.
Wall and Fence Pairing
Mount hanging planter units on south-facing walls. This maximizes sun exposure for herbs and lettuce while keeping walkways clear.
Repurposed Containers
Drill ¼-inch drainage holes in thrifted watering cans. Spray-paint with exterior-grade paint in bold colors. These become distinctive hanging planter options that personalize your vertical decor.
Plant Selection
Choose compact herbs, lettuce, and small leafy greens. These allow quick harvests and maintainable displays.
Layered Visual Impact
Empty air above your beds is usable growing space. I add shepherds hooks at staggered heights to create vertical decor layers above my raised garden beds. I hang galvanized pails, small teapots, and baskets to draw the eye upward. I place sturdy hooks near compact herbs or leafy greens. Suspended elements pair with ground plantings without crowding soil.
| Hook Height | Best Use |
|---|---|
| 3 feet | Small pails with trailing thyme |
| 4 feet | Upturned pots as mini tables |
| 5 feet | Standard baskets over greens |
| 6 feet | Tall focal points near gates |
I rotate art seasonally on hooks and gates for fresh looks. I check drainage holes in all containers. Water escapes freely. Plants stay healthy.
Create Garden Vignettes From Flea Market and Vintage Finds
I build garden vignettes by clustering three to five pieces at staggered heights. I hunt flea markets for upcycled finds. Estate sales and garage sales yield affordable junk too.
I group barnwood benches with antique coal bucket planters. I tuck impatiens and torenia between pieces. Vertical elements matter. I hang galvanized pails from shepherds hooks. I stack old ladders into arbors. A big rusty pot anchors the scene.
Four ways to build your own vignette:
1. Source cheap
Hit flea markets early. Haggle for deals. Bring cash.
2. Mix heights
Use hanging baskets. Add milk cans. Layer low to high.
3. Blend textures
Pair stones with upcycled metal. Add logs for contrast.
4. Rotate seasonally
Move components monthly. Keep the display fresh.
Repurpose Watering Cans, Teapots, and Chairs as Planter Features
After building garden vignettes with flea market finds, I turn single objects into standalone planter features.
Hanging Watering Can Planters
Short shepherd’s hooks hold decorative watering cans, teapots, or pails. Drill drainage holes in each planter. Paint recycled watering cans to match your color scheme.
Transform flea market watering cans into charming hanging planters with a fresh coat of paint and proper drainage.
Vertical Pail Displays
Galvanized pails and upturned pots create height. Hang a basket from a pail vignette. Stack an upturned pot to form a table-height planter base.
Chair Planter Platforms
Old chairs become planter stands. Sand and repaint for contrast. Set pots on the seat or replace the seat with a planted container.
Flea Market Upcycles
Vintage milk cans and ladders work as planters or arbors. Add height and swap seasonal plantings yearly.
Install Handmade Mosaic Art and Ceramic Accents
Where do you place color that lasts through storms? I build a mosaic garden with handmade pieces. Ceramic accents turn my vegetable beds into spaces that feel like mine.
1. Make Your Own Mosaics
Personal project using broken tile, grout, and sealant. I press shards into birdbaths, planters, or barn quilt patterns. Each piece marks my row ends.
2. Buy From Local Makers
Artist-made ceramic accents from fairs or online shops. I set bowls and tiles among my peppers. The glaze catches light.
3. Move Pieces Seasonally
Rotation keeps my beds fresh. I shift mosaics to new poles or gates quarterly. This creates surprise at fixed viewing spots.
4. Use Vertical Supports
Trellises and arbors need decoration too. I mount ceramic panels above my beans. The eye travels upward then down my block rows.





