
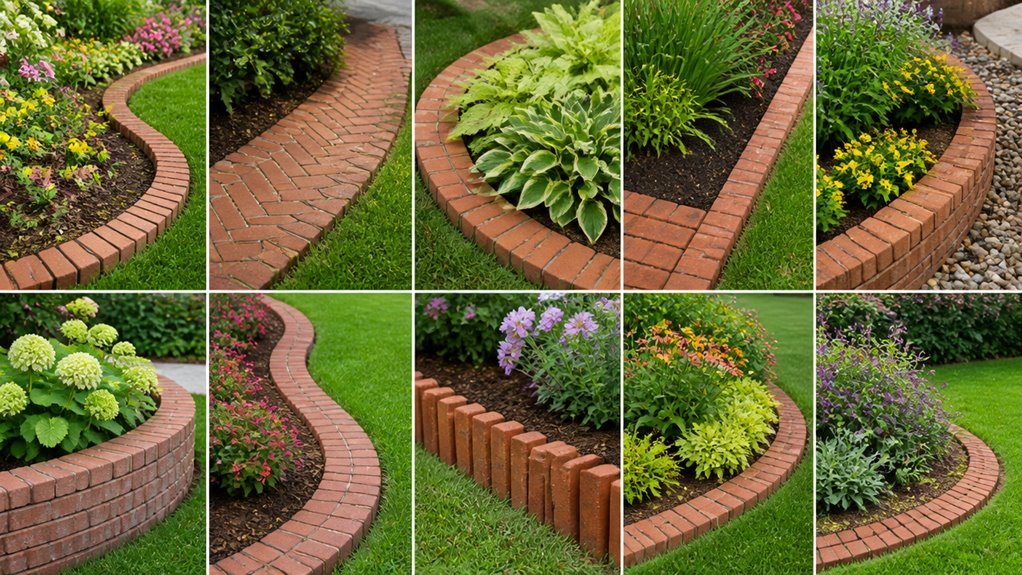
I have seen plain gardens change with nothing more than a row of fired clay.
You will need standard bricks measuring 8 by 2.25 inches, mason’s sand, and a rubber mallet.
Ten distinct patterns await your decision.
Your first choice awaits below.
Brick Garden Edging Basics: Materials, Tools, and First Steps
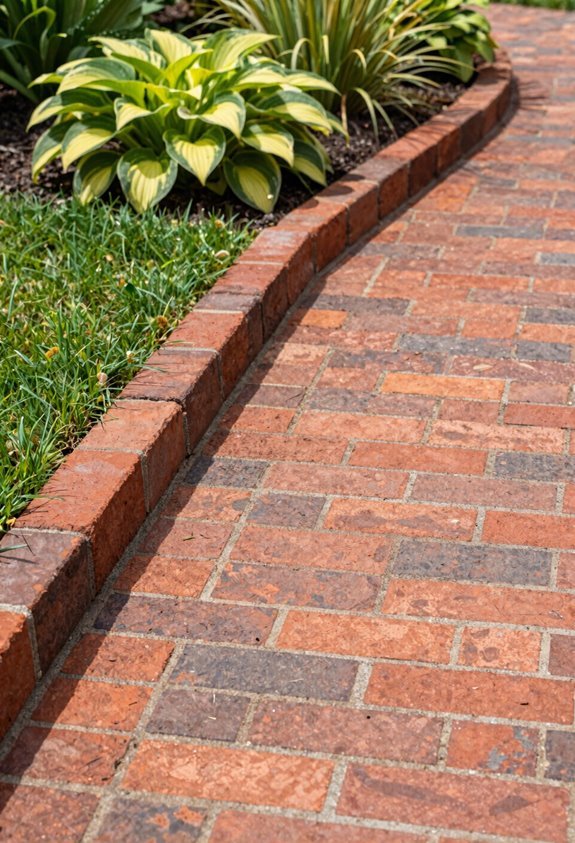
Why settle for messy garden borders when bricks can solve the problem? I’ve seen how brick edging changes a yard from chaotic to clean. You’ll need the right materials and tools to start this project.
Brick edging transforms chaotic yards into clean, defined spaces with minimal effort.
Materials
Choose red clay bricks or pavers. These materials withstand weather and provide a timeless look. Arrange them in straight runs, curves, or herringbone patterns.
Tools
Gather a shovel for digging, a level, sand or mortar, and a trowel or rubber mallet. Each tool serves a specific purpose in creating your edge.
Setting the Foundation
Dig a trench below grade for stability. Fill with sand, set your bricks, and backfill firmly. Check alignment often with your level.
Long-Term Care
Plan for drainage during installation. Add weed barrier if you prefer. Inspect mortar joints yearly and repoint when cracks appear.
Half Brick Garden Edging for a Classic Finish
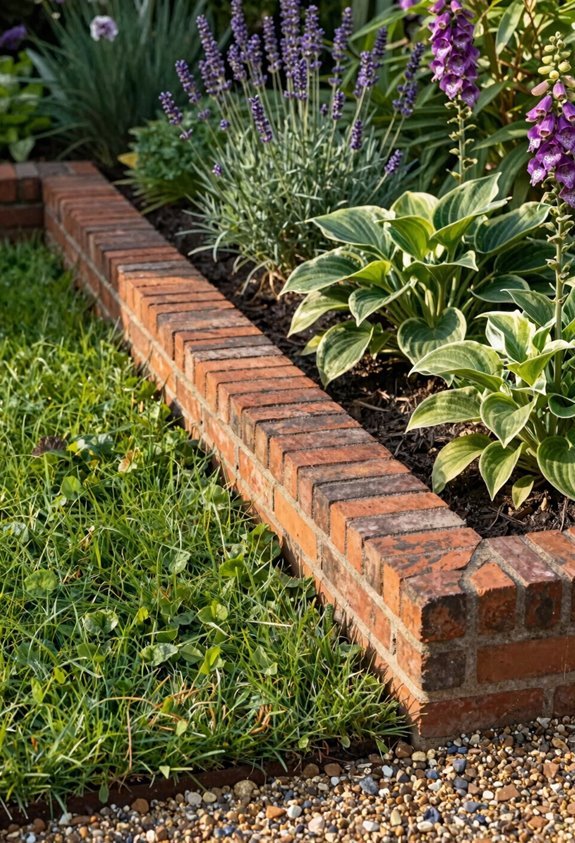
I lay half bricks upright or stack them to create a raised border that anchors my garden beds with a traditional European look. The bricks absorb moisture over time and develop a weathered patina that adds character without extra effort. I plant creeping fig or monkey grass along the edge to create sharp contrast against the brick surface.
Classic European Style
Half Chicago bricks, stood on their cut edge and buried two inches deep, create a four-inch visible border that weathers to soft copper tones. This brick edging delivers a traditional European look. Old Chicago bricks patina with moisture over time. The style visually ties fence and garden elements together. It creates a cohesive boundary between lawn and beds.
The edging supports a neat, durable border. It prevents mower damage and defines planting areas. Moisture absorption by the bricks influences shade-tolerant plant selections. It also shapes surrounding microclimates. This edging pairs well with classic garden features. Install it in a single weekend. You get a quick, timeless upgrade with minimal effort.
Moisture Patina Development
As bricks absorb ground moisture, they develop a soft copper patina that deepens over months. I notice this aging process enhances your edging’s color and character. The weathered look feels earned, not manufactured.
The patina creates slight texture changes on brick surfaces. This adds visual depth you cannot buy new. Your landscape gains a timeless quality neighbors will notice.
I recommend half brick edging for this effect. Standard clay bricks measure 3.5 by 7.5 inches. Set them halfway into soil for proper moisture contact. You’ll see changes within one growing season.
This aged border ties fence lines to garden beds. The cohesive edge unifies your yard’s hardscape and softscape. Your property gains the settled look of established European gardens.
Creeping Fig Pairing
Half brick edging stacks Old Chicago brick vertically for a traditional European look. The moisture-absorbing brick develops a natural patina over time. I pair this edging with creeping fig to create a living border that climbs and softens the hardscape.
Creeping fig prefers shade and clings to brick without support. In zone 8 and warmer, this vine reaches 20 feet or more. The dense green foliage adds texture while keeping maintenance minimal.
I plant creeping fig at the base of half brick edging along fences. The combination ties fence and garden into one cohesive edge. The result feels timeless and complete. Your gains a classic finish that neighbors will notice.
Choosing Your Brick Garden Edging Style: 4 Key Decisions

How do you pick the right brick edging for your yard? I’ve learned it comes down to four practical choices that shape how your garden looks and works.
1. Brick Style
Select plain, curved, herringbone, or stacked brick edging. Stacked styles add height and hold mulch in place around raised beds.
2. Brick Color
Pick traditional red for classic appeal or darker tones to contrast light plants. Match nearby hardscaping for unity.
3. Edging Pattern
Choose straight lines for formal gardens. Select curved or wavy patterns to soften bed-to-lawn transitions.
4. Edge Height
Balance looks with function. Raised edges contain soil and define spaces. Lower edges blend subtly with flat lawns.
Curved Brick Garden Edging for Pathways and Transitions
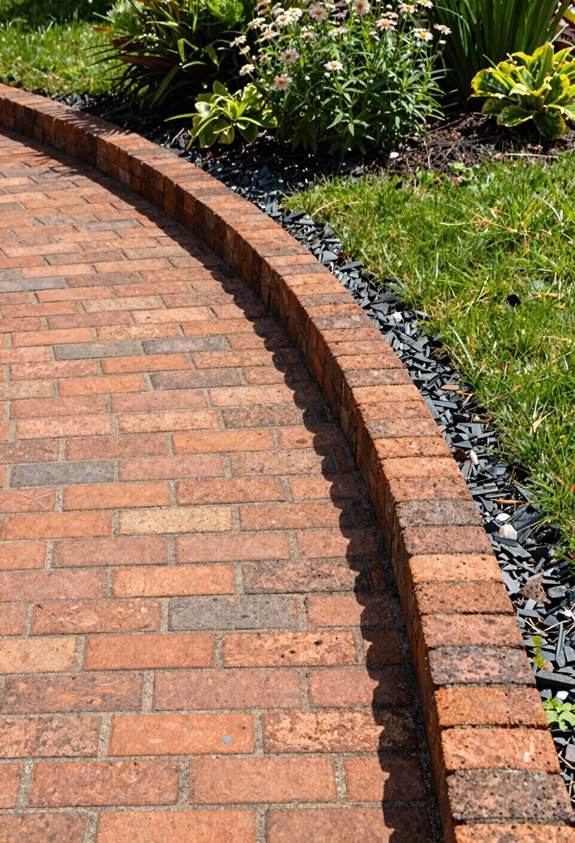
Where do you need a softer boundary in your yard? I use curved brick edging to create gentle transitions between spaces like decks and walkways. This style works with 4×8 concrete pavers which are slightly larger than standard clay bricks.
I often combine existing bricks with new ones to form a flowing irregular border. This enhances landscape movement and defines pathways clearly. The curved layout lets you mow along the edge without scuffing garden beds.
Add pink flowering plants nearby such as Knock Out Roses. These accentuate the curve and provide color contrast against the brick edging.
Apply mortar to reinforce the curve. This adds visual texture and creates a more durable finished appearance.
Herringbone Brick Garden Edging for Formal Designs
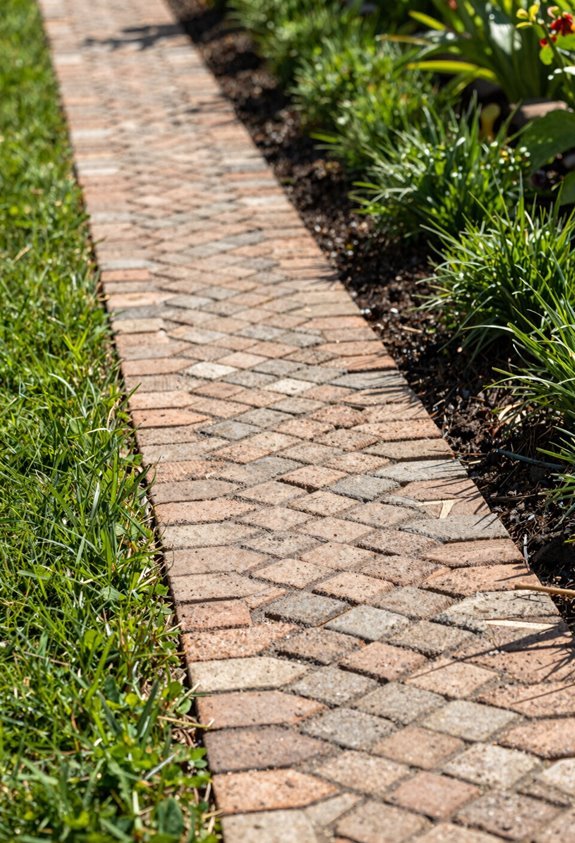
I start herringbone edging with a 45-degree diagonal pattern, interlocking standard 4-by-8-inch bricks for visual texture and movement. I apply ½-inch-thick mortar beds between joints to build pronounced texture and a rustic, handmade look. I pair this edging with traditional cottage gardens and brick hardscapes for clean, durable borders.
Pattern Layout Basics
Why settle for a plain border when you can build one that moves the eye? I use the Herringbone pattern to create diagonal, interlocking texture that pulls visitors through your garden. This 45-degree angle layout delivers strong visual texture while keeping a formal, decorative edge.
Here’s how I plan my herringbone edging:
- Map your line. I snap a straight string guide to establish the border path before placing any bricks.
- Cut with precision. I angle-cut bricks at curves to preserve the continuous diagonal rhythm.
- Pair for contrast. I mix rustic bricks with smooth pavers to emphasize the pattern’s geometry.
- Account for traffic. I select thicker mortar beds to secure bricks in high-wear zones.
Herringbone works in modern and rustic yards alike. Plan your cuts early.
Mortar Application Tips
Because precision matters in formal designs, I use a 4:1 sand-to-cement mix with just enough water to hold a firm peak. This ratio gives me the control I need for clean joints in herringbone patterns.
I apply mortar in a ½-inch bed over the prepared substrate. A thick mortar application locks each brick at its alternating angle. I check every joint with a level as I work.
I select bricks with matching height and set them with uniform ⅜-inch joints. This keeps the geometric lines crisp.
I let the mortar set for 24 hours before any disturbance. Proper curing prevents the edge shifting that ruins formal designs.
Formal Garden Pairings
Herringbone brick edging anchors formal designs with its diagonal, interlocking pattern. I use this brick edging to create crisp pathways and symmetrical beds that feel intentional and complete.
Match your walkways
Pair with existing brick paths for seamless flow.
Frame formal hedges
Create clean borders around boxwood or privet.
Line symmetrical beds
Mirror plantings on both sides of central axes.
Apply thick mortar
Build up joints to emphasize texture and polish.
This brick edging guides the eye with directional lines. It defines boundaries while supporting easy mowing. The interlocking pattern adds visual weight without overwhelming simple plantings.
I install bricks at ground level or slightly raised. Standard clay bricks work fine. Space joints 3/8 inch for mortar. This edging belongs in traditional gardens where structure matters.
Stacked Brick Garden Edging for Raised Beds and Slopes
Where do you turn when a slope threatens to swallow your soil? I stack bricks vertically to build raised bed edging that holds mulch and soil in place. This brick edging follows contour lines to stop erosion on uneven ground. I layer bricks in stepped patterns for slopes or straight walls for flat raised beds. Mortar secures joints on steep grades. Freeze-thaw cycles won’t topple a well-built stack.
| Brick Pattern | Best Use |
|---|---|
| Running bond | Flat raised beds |
| Stepped stack | Slopes under 15 degrees |
| Header-stretcher | Corners and curves |
Varied brick tones add visual interest. Cottage and traditional gardens suit this style. I pair stacked edges with well-draining soil in sun or partial shade. Plant growth stays robust. Weed intrusion drops. Submilling joints add stability where ground shifts.
Reclaimed Brick Garden Edging: Saw-Tooth and Mismatched Styles
Better Homes and Gardens features this DIY approach using reclaimed bricks set in jagged, alternating angles. You’ll need bagged mortar mix to stabilize the uneven joints against soil pressure. The finished edge creates a 4-6 inch high border with deliberate irregularity.
Mismatched Brick Charm
Pair your reclaimed bricks with loose pebbles and spreading ground cover for textural contrast. The mixed materials hide gaps between non-uniform brick sizes without demanding perfect alignment. This combination delivers a tidy lawn separation with rustic, handcrafted character.
Saw-Tooth Pattern Design
Why settle for a straight line when you can build something with bite? I use saw-tooth brick edging to add jagged texture along my lawn boundary. This reclaimed style arranges upcycled bricks in angled peaks and valleys. I mortar each brick for stability while keeping that rustic look.
Here’s what makes this design work:
- Grab secondhand bricks. I source mine from salvage yards for pennies each.
- Set bricks at 45-degree angles. I alternate directions to form the saw-tooth profile.
- Tuck mortar underneath. I place a 1-inch bed for secure anchoring without visible bulk.
- Edge with gravel or groundcover. I plant thyme between bricks to soften the line.
This brick edging pairs with pebbles or varied plantings. The tactile border separates lawn from beds while adding movement to flat landscapes.
Mismatched Brick Charm
Reclaimed brick edging brings irregular character to garden borders through varied sizes, colors, and textures.
I lay reclaimed bricks at uneven intervals. I mix reds, browns, and grays. Costs stay low. I skip matching. I embrace the uneven look.
Saw-Tooth Mix
I angle some bricks at 45 degrees. I keep others flat. I create jagged edges against smooth lawns. I use bagged mortar for setting. I space bricks 2-3 inches apart. I fill gaps with pebbles or mulch.
Sustainability Note
I repurpose old materials. I avoid landfill waste. I cut project costs by half compared to new brick.
Texture Pairing
I add mulch between bricks. I highlight nearby plantings. The contrast draws the eye along the border.
DIY Placement
I set a sand base 2 inches deep. I level each brick by hand. The rustic look hides small flaws.
Angled and Wavy Brick Garden Edging for Visual Interest
How do you break up a rigid garden layout without losing structure? I use angled brick edging. This method sets bricks diagonally, partially buried, to separate gravel paths from vegetable gardens. It creates a dynamic, non-linear boundary. The contrast with straight edges gives an informal feel.
Angled brick edging breaks rigid layouts while preserving structure—dynamic boundaries for informal, organized gardens.
I use weathered bricks for an aged look. They blend with gravel, mulch, and plantings. I tag nearby elements to clarify function in mixed-use beds.
Instagram accounts like @sledmere_house showcase this trend in modern designs.
- Angle your bricks at 45 degrees: Dig a trench 4 inches deep. Set bricks diagonally. Pack soil firmly.
- Mix textures for contrast: Pair rough bricks with smooth gravel. Add mulch between beds.
- Weather your materials: Source reclaimed bricks. Let moss grow naturally.
- Label your zones: Mark vegetables versus paths. Use simple metal tags.
Circular Brick Garden Edging for Trees and Garden Features
Personal technique. I use circular brick edging to frame tree circles and focal points. This brick edging creates clean boundaries between beds and lawn. The curved line softens hardscape edges. It flows with nearby paths or water features.
I build these borders with mortared brick for durability. The mortar locks bricks in place through freeze cycles. This brick edging needs little upkeep after installation.
The circle shape holds mulch and soil around trunks. It stops weeds from creeping in. It keeps lawn grass out of root zones.
I plant grasses or perennials inside the ring. This adds texture around the base. The brick edging stays visible as a year-round structure.
Budget Brick Garden Edging: Cost-Saving Techniques and Sources
Where do I start when I want brick edging without busting my budget? I’ve found smart ways to stretch dollars while building borders that look like we spent more.
1. Hunt for reclaimed bricks
Check local salvage yards and online marketplaces. These weathered pieces cost pennies compared to new stock. They blend right in with established gardens.
2. Install it yourself
Grab a shovel, level, and rubber mallet. Dig a shallow trench six inches deep. Fill with two inches of compacted sand. Set bricks tight. Skip the contractor fees entirely.
3. Mix old with new
Buy a small batch of fresh bricks to anchor the design. Fill remaining space with reclaimed or leftover pieces. Nobody notices the difference.
4. Repurpose what you own
Pull pavers from old patios or paths. Cut them in half if needed. Brick edging works with varied sizes and colors.





