
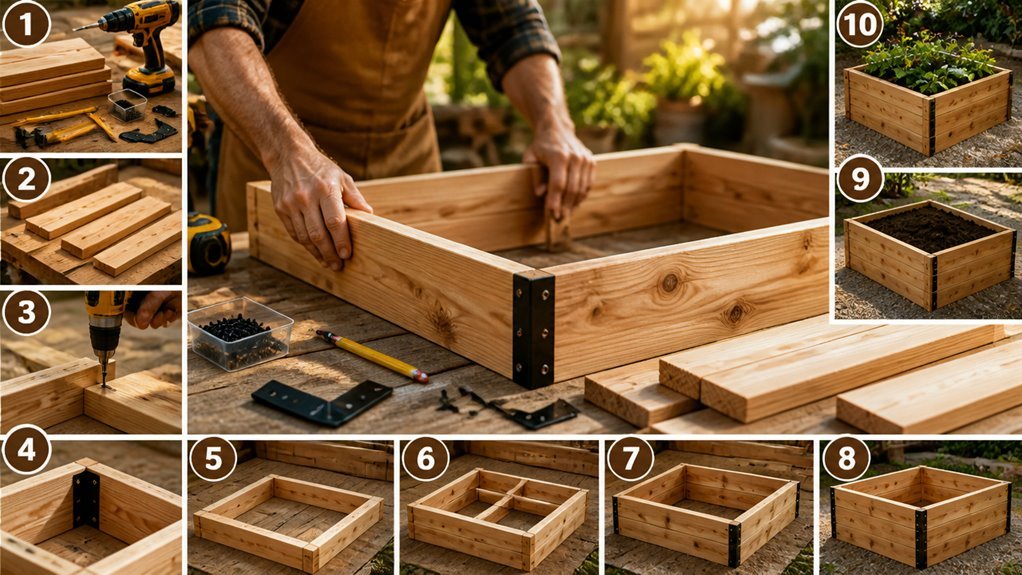
I built my first raised bed last spring using cedar 2x8s and 4×4 posts.
The bed measures 4 feet by 8 feet and stands 16.5 inches high. This height saves your back and blocks most weeds.
You need six 8-foot cedar boards, two 4×4 corner posts cut to 17 inches, hardware cloth, exterior screws, and basic tools. I will show you how to avoid the mistakes I made.
Start Here: Your 4×8 Raised Bed Project Overview
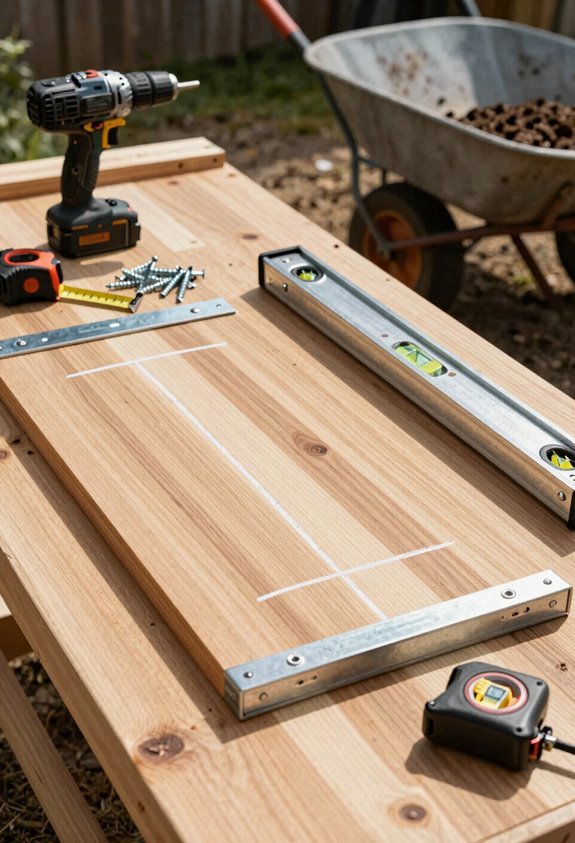
I build my raised beds 4 feet wide and 8 feet long. This DIY project uses cedar boards stacked three high for 16.5 inches of depth. I anchor everything with 4×4 corner posts set flush at each corner.
Materials You’ll Need
My standard list includes twelve 2×6 cedar boards cut to length, four corner posts, and hardware cloth cut to 4×8 bed dimensions. I add exterior screws and optional non-toxic sealer. Final outer width runs about 3 inches wider than planned due to interlocking sides.
Assembly Basics
I build short sides first on level ground. I attach long boards next. I brace the middle on longer spans. I staple hardware cloth underneath to stop burrowers. I sand rough edges. I sink all screws below the surface.
Choose Size and Sun Location Before You Build
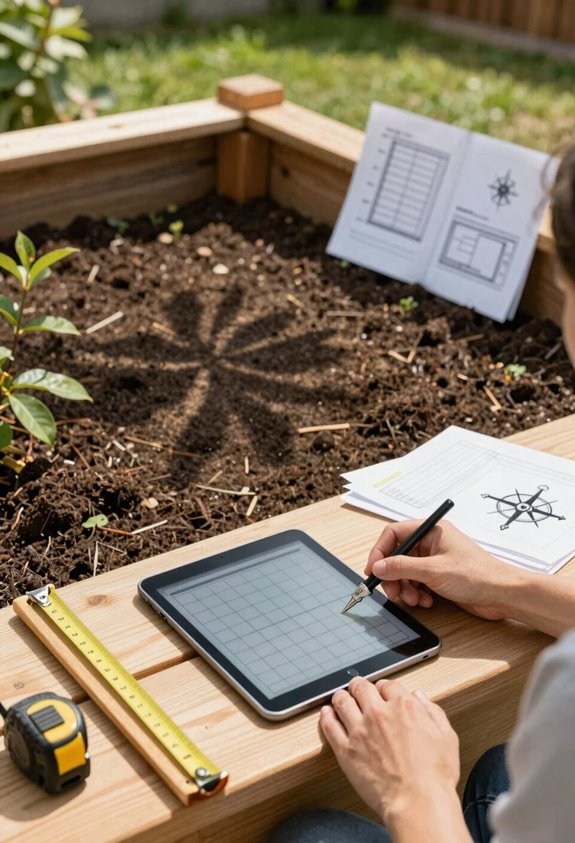
I place my beds where they’ll catch 6 to 8 hours of direct sun daily, avoiding shade from trees or buildings. I orient them north-south with 28 to 48 inches between beds for easy access. I track sun patterns across seasons so light stays consistent year-round.
Sun Exposure Requirements
Where you place your raised bed matters more than what you build it from. I learned this the hard way after watching tomatoes struggle in too much shade.
Most vegetables need 6 to 8 hours of direct sunlight daily. I use south-facing placement for maximum sun exposure in my northern hemisphere garden. Shade avoidance means keeping beds clear of tree and building shadows.
Raised bed orientation affects light distribution. I run my beds north-south so shorter sides face east-west. This gives even shading across plants all day.
Sun-tracking tools help me map light patterns through seasons. I observe for a full year before committing to year-round layouts.
Space between beds needs attention too. I leave 28 inches minimum, though 36 to 48 inches works better for moving around mature plants.
Bed Size Standards
How do you pick a size that actually works? I follow bed size standards that match real lumber dimensions and growing needs. Most of us build a 4×8 raised bed. This raised bed dimension fits standard 8-foot boards with almost no waste.
Bed height basics: I stack three 2×6 boards for 16.5 inches. This depth stops soil compaction and lets roots spread.
Lumber dimensions: Actual 2×6 lumber measures 1.5 by 5.5 inches. I account for this when calculating material.
Interlocking sides: I lay shorter sides inside longer ones. The outer width grows about 3 inches from this sandwiched assembly.
Size flexibility: I adjust lengths to match my space. Eight-foot boards limit width. I keep paths in mind when placing multiple beds.
Orientation And Spacing
Sunlight dictates where I build. I map my yard first, tracking shadows across seasons. Most vegetables need six to eight hours of direct sun daily, so I place beds clear of trees and structures.
Raised bed orientation
I align my beds on a north-south orientation. This places shorter sides facing east-west, giving plants even light throughout the day.
Spacing and bed dimensions
I space beds 28 inches apart minimum. Thirty-six to forty-eight inches works better for easy access with a wheelbarrow or mower. Wider paths let me tend plants without squeezing.
Sun exposure planning
I use simple sun-tracking tools to watch patterns. If I garden year-round, I observe light shifts across all seasons before committing to placement.
How Much Lumber You’ll Need (and What It Costs)
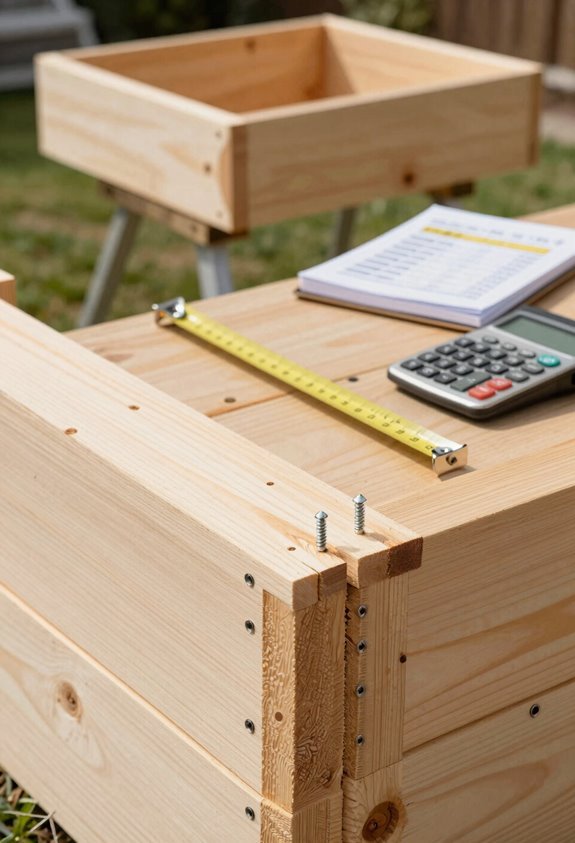
I’ll walk you through the exact boards you need. For a standard 4×8 foot raised bed standing 16.5 inches tall, you’ll need six 2×6 boards for the long sides, six 2×6 boards for the short sides, and four 4×4 corner posts cut to length. Redwood lumber lasts longest. Grab 2.5–3 inch deck screws to fasten everything together. Expect to spend $100–$300 per bed depending on your local wood prices.
Your Lumber Checklist
- 2×6 boards: Twelve total, eight feet long for sides
- 4×4 corner posts: Four posts, each two feet long
- Deck screws: One pound box, exterior grade
- Optional braces: Galvanized mending plates for extra support on long spans
Soil and compost cost extra. Hardware cloth and landscape fabric add to your lumber list if you want them.
Cut and Seal Your Boards Like a Pro
The boards need sealing before assembly or after. I choose what works for my schedule. Sealing early lets me stack dry boards.
Waiting until after means I coat every surface once built. Either way, I apply two coats for durability.
I cut boards to length now. My final outer width grows about 3 inches due to interlocking sides. Corner posts add bulk. I measure twice.
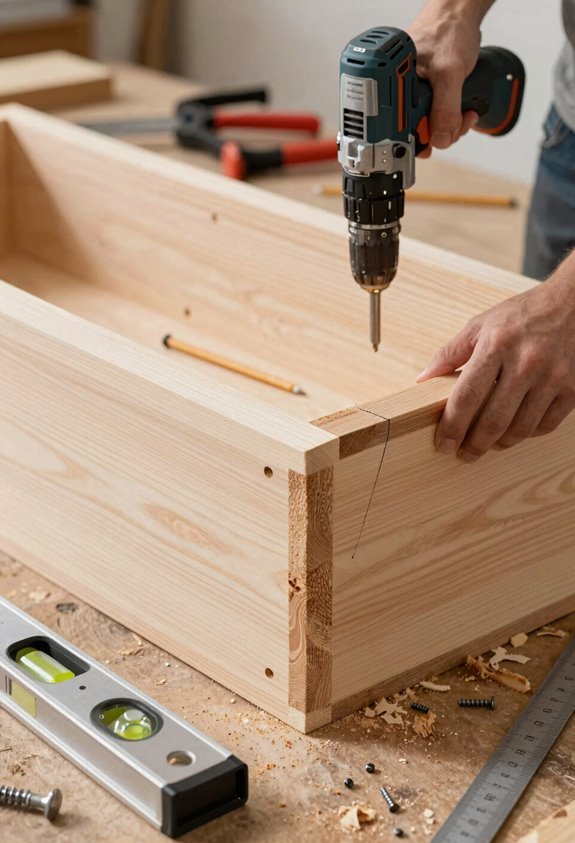
I keep ends flush with outer edges of 4×4 supports for tight joints. No pilot holes in corners. I sink screws toward the center to prevent splits.
| Timing | Benefit |
|---|---|
| Seal before | Faster assembly, no waiting |
| Seal after | Covers all cut edges completely |
| Two coats | Maximum weather protection |
Assemble Short Sides First: The Secret to Square Corners
I start on a level surface with two 4 by 4 corner posts laid parallel. I place short 2 by 6 boards on top with ends flush to the outer edges of the posts. I measure the gap between posts at both ends to confirm square and fasten with two 2.5-inch decking screws per end, sinking toward the center and keeping screws one inch from edges to prevent split wood.
Corner Post Alignment
Why do corners drift out of square? They slip when we rush the build without checking measurements. I’ve learned that assembling short sides first locks in squareness before the frame grows too large to adjust.
Here’s how I align my corner posts:
- Position parallel 4×4 corner posts, set them on level ground, spaced to your shortest side length
- Lay 2×6 boards flush, match board ends to outer edges of the 4×4 corner posts
- Measure both diagonals, verify squareness before driving any decking screws
- Build two identical short sides, check inner distances between 4×4 corners match exactly
I secure each joint with 2.5–3 inch decking screws sunk toward the center of the 4×4. This prevents splitting and holds alignment. Once both short sides match, my raised bed frame stays square through final assembly.
Screw Placement Technique
Once my corner posts sit parallel and level, I’m ready to fasten the short side boards.
I lay two cut 4×4 corner posts parallel on a level surface. I space them to match my shortest side board width. I place short 2×6 boards on top so ends flush with outer edges of corners. This creates my square reference.
Stabilizing Corners
I drive two 2.5, 3 inch decking screws into each 4×4 corner post. My screw placement stays at least 1 inch from board edges. This edge distance prevents splitting. I sink screws toward the center of posts to minimize protrusion.
Checking Squareness
I measure inner corners of 4×4 corner posts at both ends. I repeat for the second short side. I verify both sides stay square and parallel before adding long boards.
Connect Long Boards and Build Your Frame
Where do you start when the corners are ready? I’ll lay two 4×4 corners parallel on level ground to mark my bed’s footprint.
Start with two 4×4 corners laid parallel on level ground to mark your bed’s footprint.
Short Side Assembly
I place short 2×6 boards atop the corner pieces, ends flush with outer 4×4 edges. I drive 2.5–3 inch decking screws through each end, keeping screws 1 inch from edges.
Frame Erection
I stand these short sides on edge, spacing them to my bed’s finished length. This creates the skeleton for my frame.
Long Board Attachment
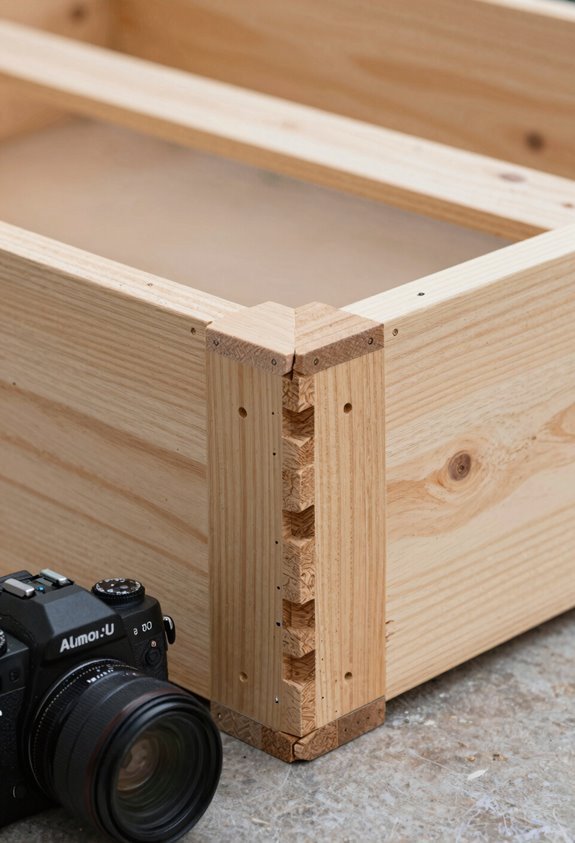
I lay long boards across the top, checking alignment so outer edges sit flush with short sides. Two decking screws at each end bite into 4×4 corners.
Final Check
I verify square corners and flush joints before moving forward. Solid connections now prevent headaches later.
Add Side Supports to Stop Bowing
I use side supports to keep long boards from bowing outward under soil pressure. A 12-inch galvanized steel mending brace works best for a 16.5-inch tall bed spanning three side boards. You can also use a 2×4 or 2×2 inside the frame if metal isn’t available.
Why Supports Matter
Long beds warp without bracing. I learned this the hard way when my first raised bed length stretched past six feet and the sides bulged outward within one season. Soil exerts constant pressure. Without bed bow prevention, your structure fails.
I use middle-side support on every long span. This single addition stops flex before it starts. Corner 4×4 anchors lock the frame in place. I tighten all hardware reinforcement until the boards sit flat. A framing square checks that corners stay true. I measure diagonal distances to confirm squareness under load.
Metal Braces
Galvanized steel mending braces span all three side boards on 16.5-inch tall beds.
Wood Substitutes
Extra 2×4 or 2×2 lumber reduces flex when metal isn’t available.
Anchor Points
Secure corner posts create a rigid frame that resists soil pressure.
Final Check
Verify flat boards and square corners before filling with soil.
Brace Types Explained
A 6-foot span demands reinforcement. I always add a middle-side support to stop bowing and keep edges straight.
Galvanized Mending Brace
Best for 16.5″ tall beds. Use a 12″ brace for smaller builds. Attach with screws through all three side boards.
Interior Attachment Method
Mount raised bed braces inside the frame. Keep them tight and full-length to resist flexing. This hides hardware from view.
Longest Side Alignment
Always brace the longest wall first. This gives maximum edge reinforcement where soil pressure hits hardest.
2×4 Substitute
No galvanized mending brace? Use a 2×4 or 2×2 as internal support. It works. It costs less. It takes more time to install.
Pick your method. Build it square. Sleep easy.
Installation Best Practices
Every bed over six feet needs a middle brace. I install raised bed supporters along the long edge to stop bowing before it starts.
Mid-span brace placement: I center a galvanized steel mending brace across all three side boards on 16.5-inch beds. Twelve-inch braces work for shorter setups.
Secure through centers. I drive fasteners through the long edge into each side board. This tightens alignment and keeps the wall straight.
Timber/2×4 backup. When metal is not available, I use 2×4 or 2×2 supports at mid-span. They share loading just as well.
Final check. I recheck squareness and tighten bolts. This keeps deformation resistance strong and maintains frame rigidity for years.
Install Hardware Cloth and Weed Fabric
Protecting your raised bed starts at the bottom. I cut hardware cloth to match my bed bottom dimensions using aviation snips. I overlap pieces where needed and secure them with wide-head cabinet screws. The screw heads clamp the cloth tight against the wood. I place fasteners in the middle too. This stops pests from burrowing up through the soil.
I add weed fabric under the hardware cloth for extra weed suppression. Some builders put landscape fabric on top instead. I install this layer during assembly so it sits beneath the soil and above the bottom supports. The cloth blocks pests. The fabric aids drainage and root health. Both layers work together to protect my raised bed investment.
Level Your Site and Position the Bed
With the bed assembled, I turn my attention to the ground beneath it. You need level ground before placement. This ensures even water distribution and prevents uneven bed height. Use a carpenter’s level or flat reference surface to check.
Your bed needs a level foundation. Compacted soil or level concrete works. This stops wobbling and keeps construction square.
* Sun Exposure
Place beds where they’ll get 6–8 hours of direct sunlight. Avoid shade from trees or structures. Consider north-south orientation for even light.
* Position Beds
Observe sun patterns for a year. Use tracking tools to confirm year-round light availability.
* Spacing Between Beds
Leave 28 inches minimum between beds. Thirty-six to forty-eight inches works better.
* Access Around Beds
Plan space for movement on all sides. This makes tending your garden easier.
Fill, Plant, and Maintain Through the Seasons
How do I turn an empty frame into a productive growing space? I fill my raised bed with a blend of garden soil, compost, and aeration additives. I add soil amendments to boost nutrients for the season ahead.
I install drip irrigation or risers to keep moisture consistent. This saves time and reduces waste. For weed suppression, I lay landscape fabric under the bed. I add hardware cloth to stop burrowing pests. These steps cut maintenance later.
I pick plants for 6 to 8 hours of daily sun. I rotate crops each year to protect soil health. I watch for pests, shade shifts, and soil changes. I adjust watering, mulching, and placement as seasons change. This keeps my build productive year-round.





