
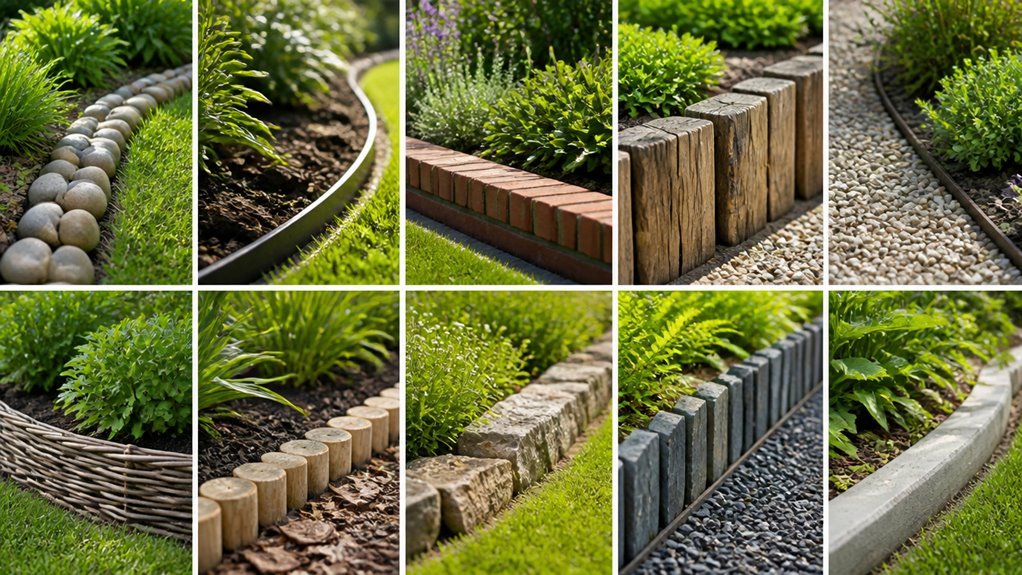
I have tested dozens of border methods on my own beds. Some cost nothing but time. Others run under $2 per linear foot. The trick is matching material to your garden style and soil type.
I will walk you through ten approaches that look intentional without the contractor bill.
Dig a Free Trench Edge for Zero-Cost Garden Edging
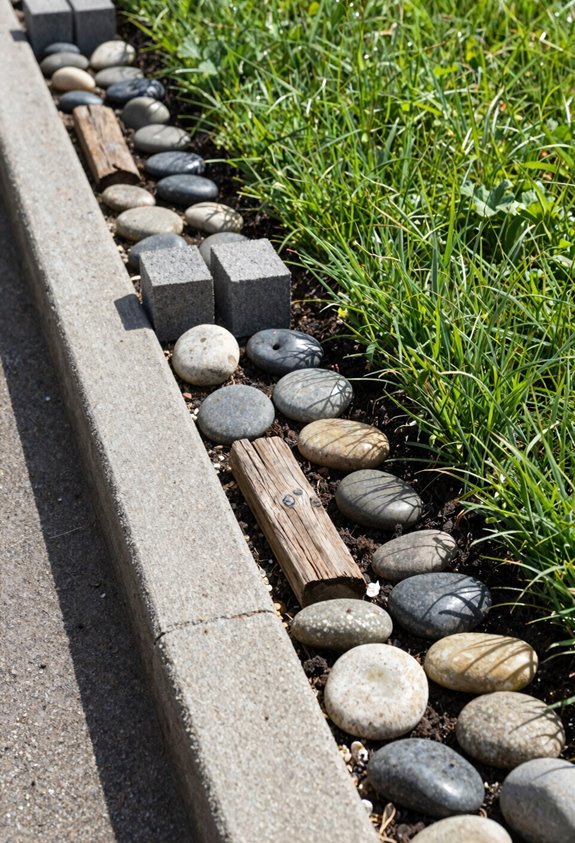
I cut a clean V-shaped trench along my bed edge using a flat-edged spade or half-moon edger. I go about four inches deep for a sharp, natural lawn-to-bed border. I angle the cut back toward the garden bed. This forms a small channel.
A sharp V-shaped trench, cut four inches deep with a spade, creates a clean, natural lawn-to-bed border that defines your garden edge.
The channel defines the edge and stops grass from spilling over. This trench edge gives a professional look. It costs nothing but effort and time. No materials are required.
I call this zero-cost edging. Grass creeps back eventually. I re-cut the edge a few times per season. This is normal maintenance.
Beyond periodic re-edging, upkeep stays minimal. The method works for any garden style. It keeps beds tidy without spending money.
Use Reclaimed Brick Edging for Cottage-Style Gardens
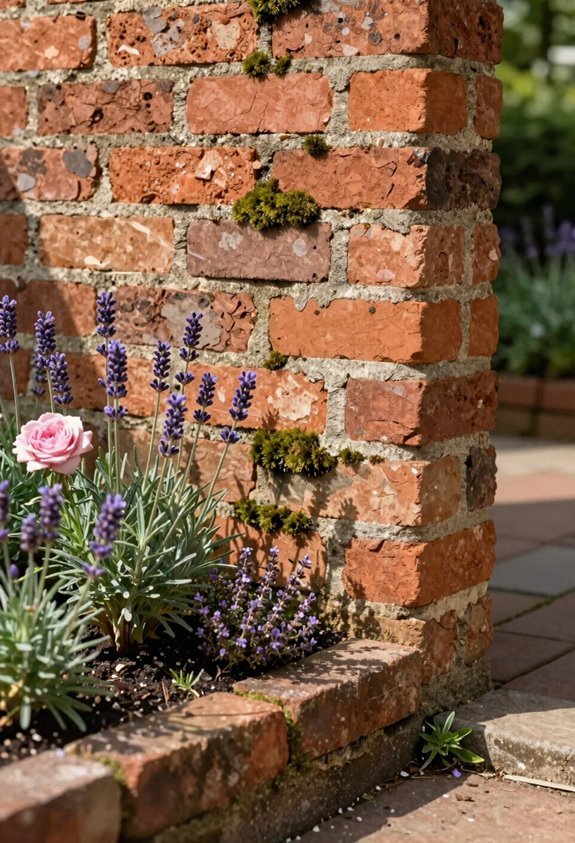
I find reclaimed bricks at demolition yards for pennies or free if I haul them myself. I lay them flat for a low border or stand them on end for more texture and height. I dig a 4-inch trench, add 2 inches of sand, and set the bricks tight against each other for a stable edge that lasts decades.
Sourcing Free Materials
Where do budget-minded gardeners find rock-solid edging materials? I start with local demolition sites and salvage yards. Reclaimed bricks cost little or nothing. Budget-friendly sourcing connects me to materials with history and character.
Demolition Yards
Salvage from torn-down buildings. Bricks often sell for pennies each. I haul them home myself.
Online Marketplaces
Neighbors list free bricks after renovations. I check weekly listings. Quick pickup builds community ties.
Construction Sites
I ask permission before taking discarded materials. Workers appreciate the cleanup help. Everyone wins.
Historic District Renovations
Older homes yield weathered bricks. The aged patina fits cottage gardens. I develop relationships with contractors.
Local Brick Recyclers
Specialized yards sort and clean reclaimed bricks. Prices beat new materials. Eco-friendly edging starts here.
Flexible Layout Styles
Reclaimed brick edging adapts to any cottage garden border. I use reclaimed bricks to create borders that fit curved beds and straight paths with equal ease. The flexible layout lets me lay bricks flat for a clean, low edge or stand them vertically for more height and texture. Diagonal patterns add visual interest without extra cost.
This durable edging handles freeze-thaw cycles season after season. I source my reclaimed bricks from local demolition sites and salvage yards, paying a fraction of new brick prices. A standard trench runs four inches deep with a one-inch sand base for leveling.
Bricks press snugly together, forming a stable border that keeps soil and mulch contained. The weathered patina blends naturally with cottage garden plantings.
Simple Installation Steps
How easily can reclaimed brick transform a garden edge? With reclaimed bricks, I create cottage charm without breaking my budget. The installation steps are straightforward.
I dig a shallow trench six inches deep and wide. I spread two inches of sand for a level base. I set bricks flat for a low profile or vertically for texture. I maintain consistent spacing for stability. I backfill with soil and tamp firm.
- Source locally. Salvage yards connect me to my community’s history.
- Match colors intentionally. Harmonious tones make my garden feel ordered, not accidental.
- Embrace imperfection. Weathered surfaces give that coveted natural look.
- Plan for growth. I leave room to expand beds without starting over.
- Maintain simply. I reset bricks as needed rather than replacing materials.
This edge lasts through freeze-thaw cycles.
Collect Free Stones for Natural Garden Edging
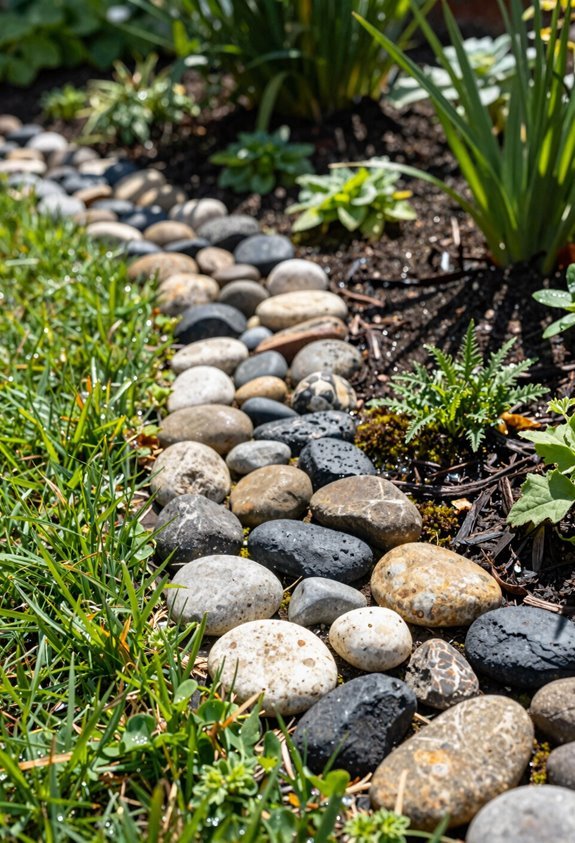
I scout my own yard first for flat fieldstones or river rocks before spending a dime. I ask friends with land if I can haul away their excess stones. I drive through neighborhoods after landscaping projects and spot free piles curbside. These stones cost nothing and build a natural border that feels grounded in place.
| Stone Type | Best Use |
|---|---|
| Flat fieldstones | Stacking for low edging walls |
| River rocks | Loose edging along curved beds |
| Limestone slabs | Formal garden borders |
| Granite chunks | Heavy-duty driveway edging |
| Mixed sizes | Cottage-style natural borders |
I press larger, flatter stones into soil for stability. I stagger them slightly to lock them together. I avoid small round rocks that roll and scatter.
I check my edging each season and reposition settled stones. This keeps the line crisp without mortar or money spent.
Add Gravel Edging That Doubles as a Mowing Strip
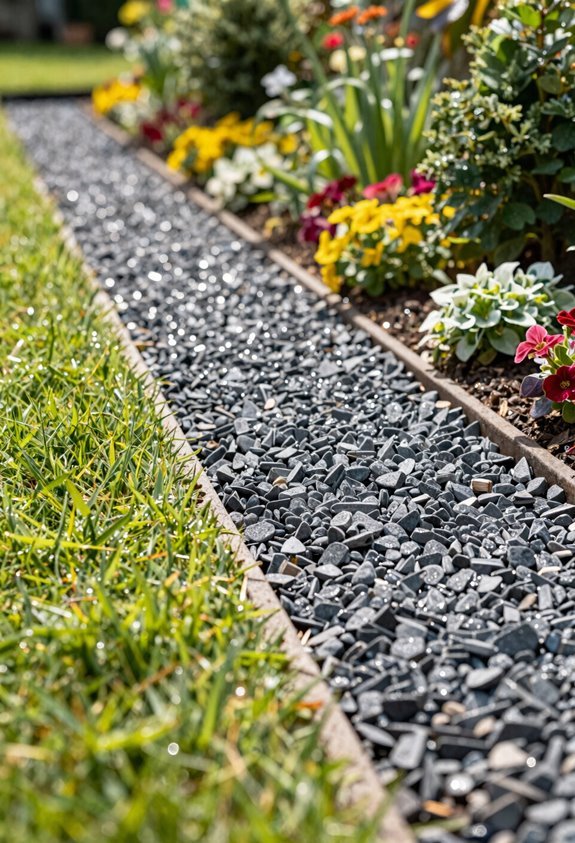
I use gravel borders because they create clean lines and protect garden beds from mower wheels. Dig a six-inch trench, lay weed barrier fabric, then fill with pea gravel or river rock to your height preference. This setup stops grass roots and keeps maintenance straightforward year after year.
Why Gravel Works
- Visual separation: Fine pea gravel or chunky river rock creates texture that distinguishes lawn from planting areas
- Design flexibility: Match stone size to your garden style, from cottage casual to structured modern
- Installation speed: Dig six inches, lay weed barrier, fill with stone, done in an afternoon
- Cost control: Bagged stone from any home store keeps budget tight
- Low ongoing care: Rake seasonally, top up yearly, and the border stays sharp
This is the edge solution that belongs in every practical gardener’s toolkit.
Building the Border
Gravel edging works best when it serves two jobs at once. I dig a shallow trench six inches wide. I line it with weed barrier. I fill it with gravel or crushed stone. This creates a mowing strip that also works as a gravel border.
Material Choices
Pea gravel gives a soft, lighter look. River rock adds natural texture. Crushed stone creates a flat, uniform line. I pick based on my garden style.
Key Installation Step
The weed barrier stops grass and weeds from creeping in. This cuts my maintenance time.
Dual Purpose
My gravel border doubles as a mowing strip. I run my mower wheels right on the edge. No extra trimming needed.
Upkeep
I top up gravel when it settles. I check the barrier each season.
Weed Prevention Essentials
When I install gravel borders that double as mowing strips, I start with a six-inch-wide trench lined with weed barrier. I fill it with pea gravel or river rock to stop weeds and keep edges clean. This setup lets me mow right up to the bed without string trimming. I pick edging materials that match my patio color so everything feels connected.
The weed barrier keeps roots from sneaking through for seasons.
- Dig six inches wide and deep enough to hold two inches of gravel over the barrier
- Choose pea gravel for softness or river rock for texture against lawn
- Match gravel color to nearby stone or siding for seamless borders
- Top off yearly as gravel settles and check for barrier tears
- Spot-treat any weeds that root in spilled soil immediately
Choose Timber Edging for Straight, Long-Lasting Bed Borders
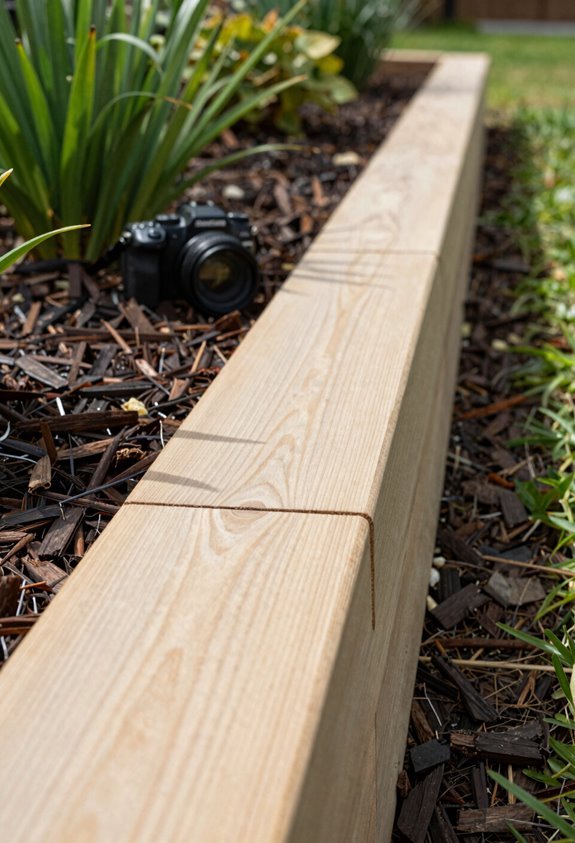
Timber edging works best for straight borders around vegetable beds and raised areas.
For clean, straight lines around vegetable beds and raised planting areas, timber edging remains the practical choice.
Choose Treated or Untreated Wood
Pressure-treated timber gives you durability in wet soil. Some of us skip treatment for vegetable beds. Both options work.
Secure with Rebar or Spikes
Drive metal stakes every 3-4 feet. This stops shifting through freeze-thaw cycles. Your straight borders stay put for years.
Skip Curves
Timber edging resists bending. Use it where you need right angles and long runs. It looks clean and intentional.
Maintain Annually
Seal exposed ends. Check for soft spots. Keep soil slightly back from the wood to reduce rot.
Cost and Lifespan
Expect 5-10 years from standard boards. Treated timber edging pushes toward 15 years with basic care.
Bend Metal Garden Edging for Invisible Modern Lines
I choose metal edging when I want borders that nearly disappear into the landscape. Steel and aluminum strips bend easily around curves, hugging organic bed shapes without the bulk of wood or stone. I dig a solid trench, anchor the strips firmly, and expect steel to rust gracefully while aluminum stays bright but may shift in loose soil.
Why Choose Metal
Metal edging delivers the cleanest border you can install. I use steel or aluminum strips for razor-thin lines that nearly disappear. The metal bends around curves where timber cracks and brick won’t flex. This edging gives gardens a modern look that keeps eyes on your plants, not your borders.
Durability That Lasts
Steel develops a rust patina. Aluminum stays bright. Both outlast wood rot.
Flexibility for Curves
Bend the strip by hand. Shape tight corners or sweeping arcs without cutting.
Invisible Profile
Bury it two inches deep. Only a quarter-inch shows above soil.
Material Choices
Steel weighs more for windy sites. Aluminum works for sandy soils.
Long-Term Value
Metal edging pays off over decades. You won’t replace it like plastic or timber.
Installation Tips
Why guess your curves when you can test them first? Lay your metal garden edging strips on the ground and shape them before you dig. Pre-bend steel or aluminum sections with smooth, even arcs. Check the fit against your bed lines. Adjust until the border hugs the curve tight.
Dig a shallow trench. Keep the top 1-2 inches below soil level. This hides the edge for invisible lines. Drive stakes through pre-drilled holes to lock strips in place. Backfill firmly.
| Issue | Fix | Tool |
|---|---|---|
| Gaps at curves | Pre-bend and test-fit strips | Knee pads |
| Edging pops up | Drive stakes deeper | Rubber mallet |
| Uneven top line | Check trench depth with line level | Line level |
| Loose soil shifts aluminum | Pack backfill tight, add extra stakes | Tamping tool |
| Strip kinks | Bend gradually, avoid sharp angles | Work gloves |
Follow these installation tips. Your garden edging will hold clean, modern lines for years.
Aging Appearance
Steel strips reward patience. I watch the bright steel shift to a warm patina over months. That rusted tone melts into dark soil. It becomes inconspicuous edging you barely notice.
Patina Development
Natural oxidation changes steel from silver to rust-brown. This process takes one to two seasons. The aged surface softens against garden beds.
Durability Factors
Treated steel gains strength as it darkens. The surface rust protects deeper metal. Aluminum stays bright but lacks this weathered charm.
Soil Stability
Loose soil causes subtle shifts. I press strips into compacted earth or sand. This locks the bend in place.
Fastener-Free Lines
Continuous strips with minimal gaps look clean. No visible screws break the line.
Bend Technique
Shallow trenches hold snug curves. I bend metal to follow bed shapes exactly.
Extend Mulch Edging for Soft, Low-Maintenance Borders
Because I want a border that blends into the garden, I extend my mulch 6 to 12 inches past the planting bed. This creates a soft transition without buying rigid materials. My mulch border pairs naturally with cottage gardens and informal paths.
I keep the layer evenly thick to prevent gaps. Grass creeps over time, so I top up twice yearly. This method works when I am already buying mulch for beds. Edging with mulch costs little or nothing extra.
Watch for grass intrusion at the edges. Reseed or redefine the line as needed. The result is low-maintenance and calm. This suits relaxed gardeners who prefer subtle boundaries and minimal upkeep routines.
Grow Living Edging With Low Ground Covers
I plant creeping thyme, sedum, or mondo grass along my bed edges to create a living border. These ground covers form a soft, natural barrier between lawn and bed. They suppress weeds and cost less than stone or brick.
Living Edge Benefits
*Ground covers knit together over time. They create seamless transitions you cannot buy at a store.*
Speed of Establishment
*A living edge fills faster than hardscaping. You will see results within two growing seasons.*
Cost Savings
*Self-seeding plants and divisions from your garden cut expenses. This makes living edging ideas accessible to any budget.*
Maintenance Needs
*Trim edges twice yearly. Replace stressed plants promptly.*
Long-Term Care
*Divide clumps every three years. This keeps your living edge dense and neat.*
Use Log Round Edging for Rustic Woodland Borders
Why settle for store-bought borders when fallen trees offer free materials? I slice fallen trunks into 12-18 inch log rounds. I set them upright 2-3 inches deep for rustic edging that feels like home.
| Feature | Specification |
|---|---|
| Height above ground | 6-10 inches |
| Diameter range | 8-16 inches |
| Spacing between rounds | 1-2 inches |
This garden border suits woodland plantings. Uneven heights and exposed bark blend with cottage gardens.
I avoid tight curves. Irregular shapes make precise lines impossible. Untreated wood rots in 3-5 years. I refresh sections as needed. High-traffic areas fail here. The organic look rewards patient gardeners who embrace imperfection. Free materials from neighbors strengthen community ties.
Install Paver Edging for Clean, Color-Matched Boundaries
Straight lines suit modern and traditional gardens alike. I install paver edging when I want a clean edge that ties my whole yard together. This method gives me a durable boundary without mortar or high costs.
Straight paver edging delivers a crisp, unified yard boundary without mortar or high costs.
Match your hardscape: I pick pavers that echo my patio or walkway color for unified design.
Use a sand bed: I trench four to six inches deep and lay compacted sand for frost-proof stability.
Source reclaimed materials: I scout salvage yards for cheap bricks with character.
Choose your profile: I set scalloped edges up or flip standard pavers for alternate looks.
Backfill tight: I pack sand or fine gravel around each paver to lock the row in place.
Paver edging resists freeze-thaw damage and needs almost no upkeep.





