

I will show you seven ways to transform plain terra cotta into durable garden pieces. You’ll need acrylic paints, painter’s tape, exterior polycrylic sealant, and a 2-inch foam brush.
Each method takes under one hour of active work plus drying time. The results last three to five years with proper sealing.
One technique in particular solves a common labeling problem that most gardeners encounter. Let’s examine the options.
Paint Geometric Flower Pots in Under an Hour
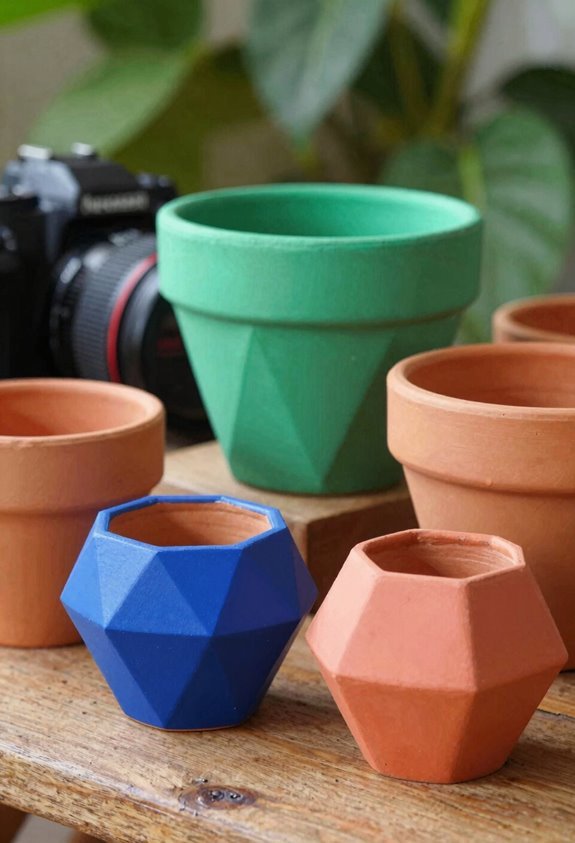
Why stick with plain terracotta when sharp lines and bold shapes take minutes to create? I grab Painter’s tape and strip it across terracotta pots in triangles, chevrons, or stripes. I press edges firm. No ruler demands my hand.
I paint exposed sections with contrasting colors. White and green sit clean on burnt orange clay. I peel tape before paint dries. Crisp lines emerge. Geometric patterns finish fast. I complete each pot in under one hour.
Kids tape alongside me. Adults match decor to rooms. Bold geometric decor belongs on every shelf. Clean edges forgive shaky hands. Fresh contemporary contrast needs no skill. Just tape, paint, peel, repeat.
Easy Animal Faces for Kids’ Painted Pots
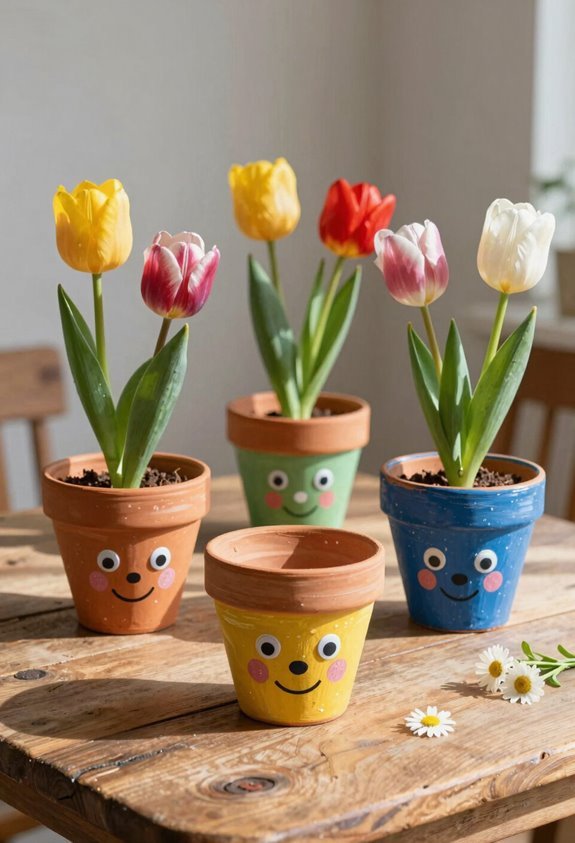
I’ll walk you through two animal designs that work for any skill level. Start with a Simple Cow Design, attributed to Its Always Autumn; grab a 6-inch white terracotta pot, black and pink acrylic paint, and a 1-inch flat brush, then paint large oval spots and add a pink snout with two ½-inch nostrils.
For Cute Cat Faces, also attributed to Its Always Autumn, use the same 6-inch white pot plus orange or gray paint, a ¾-inch brush, and a circle stencil for 1½-inch eyes, finishing with a small triangle nose and six ¼-inch whisker lines.
Simple Cow Design
Simple Cow Design
*Pot painting, cow design, kids craft*
A light-colored terracotta pot serves as your base. I paint a white face with black spots using basic shapes. Kids imitate this easily.
I map features with simple templates for eye placement, ears, and a gentle smile. I use a thin brush to outline facial features for clean, kid-friendly lines. I add minimal details: a pink nose, small udders or bells. I finish with protective spray to prevent chipping.
Kids display pots indoors or in sheltered outdoor areas.
Cute Cat Faces
I’ve found cat faces bring instant charm to painted pots, and terracotta pots make the perfect canvas for this kid-friendly project. Using templates keeps shapes consistent and frustration low.
Here’s why this approach works for our crafting community:
- Silhouette templates eliminate guesswork for clean results every time
- Acrylic paint covers terracotta evenly with two thin coats
- Whiskers add personality using a thin liner brush at 1/8 inch width
- Sealant protects your “Painted cats terracotta pots” design outdoors
I transfer my template with graphite paper, fill the shape with black or orange craft paint, then add green eyes at 1/2 inch diameter. These painted pots suit windowsills and patios alike.
Cat lovers in our group display them year-round, paired with catnip or succulents for coordinated garden appeal.
Make Ice Cream Cone Pots That Look Good Enough to Eat

Why settle for plain terracotta when you can turn a simple flower pot into a dessert-inspired piece? I’m sharing one of my favorite painting ideas for flower pots that brings out the kid in all of us.
Ice Cream Cone Pot
Paint the bottom third tan for the cone. Trace a rounded top with pencil. Fill with white paint. Let it dry. Add cross-hatching for waffle texture. This step takes practice. Top with bright dots for sprinkles. Seal with outdoor varnish.
This design works on any size flower pots. The ice cream cone shape draws smiles from neighbors. Use acrylic craft paint and a 1-inch flat brush. Apply two coats for coverage. The sealant prevents chips from weather.
Display on patios or porches year-round.
Try Black-and-White Painted Flower Pots for Any Room
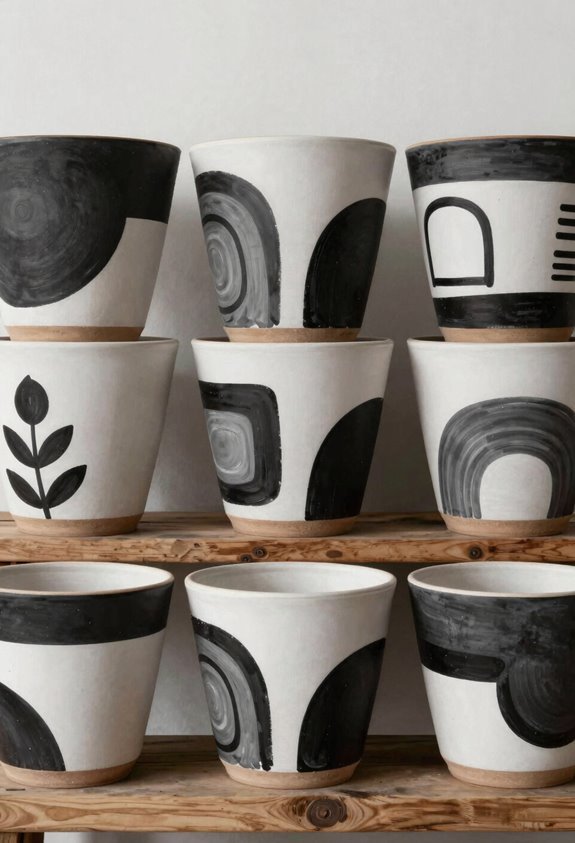
Black-and-white painted flower pots offer a timeless color combination that works with any decor. Paint easy hand-painted lines with 1-inch masking tape and acrylic craft paint in matte or gloss finish. This versatile room matching style fits living rooms, kitchens, or bathrooms without clashing.
Timeless Color Combination
Where do you start with a color scheme that never fails? I always reach for black-and-white painted flower pots. This pairing belongs in every home. It anchors modern spaces.
It warms rustic rooms. The contrast just works.
I use these four painting techniques to keep things simple:
- Masking tape edges: I press painter’s tape for crisp borders between colors.
- Freehand dots: I load a brush and stamp uneven spots for texture.
- Solid blocks: I tape off geometric shapes, paint each section, peel for clean lines.
- Irregular stripes: I skip rulers. Wobbly lines look stylish, not sloppy.
I plant flowers, herbs, or succulents in these pots. They sit on my windowsill. They fill my shelves. I add a red cushion or blue vase nearby. You can too.
Easy Hand-Painted Lines
I keep a steady hand for this technique. I load a flat brush with black acrylic paint. I draw 1-inch vertical stripes around the pot. I space each line 2 inches apart. I let the paint dry for 30 minutes.
This black-and-white method uses hand-painted lines. The strokes do not need perfection. Wobbly edges add character. Each pot looks personal.
This approach is beginner-friendly. Kids and adults can participate. I use only two colors. The contrast speaks clearly.
I vary the pattern with dashes or triangles. I keep the same 2-inch spacing. I paint three to five pots as a set. The collection ties together.
The look fits any shelf. No art training required. I finish in under an hour.
Versatile Room Matching
Why limit your pots to one space? Black-and-white painted flower pots move with you. They fit any room you choose.
Timeless Neutrality
Black-and-white pairs with bold walls or soft pastels. Your flower pots never clash.
Accessible Hand-Painting
Imperfect lines add charm. Kids and adults both succeed.
Simple Pattern Options
- Dots create rhythm
- Stripes add structure
- Geometric shapes suit modern spaces
- Mixed patterns personalize your look
These options deliver versatile decor for any interior style.
Plant Contrast
Green foliage stands out against black-and-white. Your plants become focal points.
Functional Labels
Chalkboard paint on flower pots lets you label herbs. Switch labels anytime.
Paint your pots black-and-white. Enjoy decor that belongs everywhere in your home.
Layer a Koi Pond Scene on Your Flower Pot
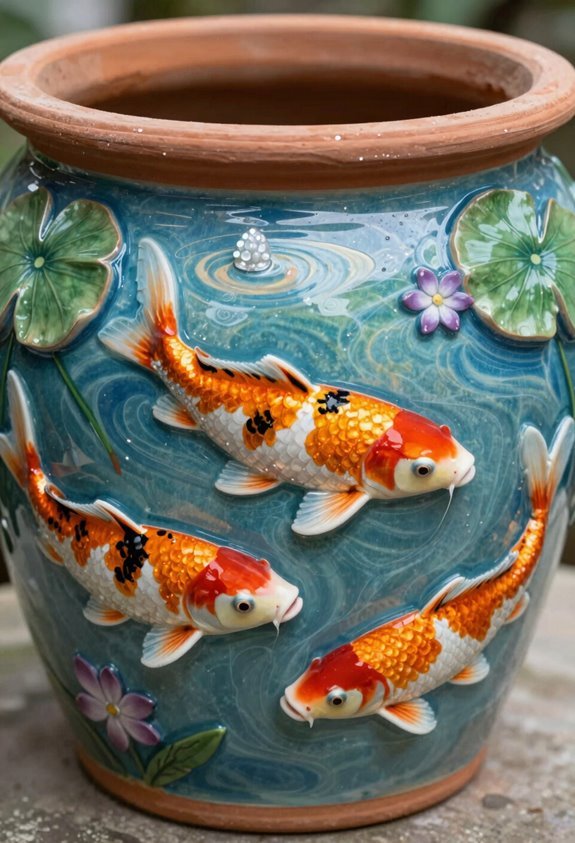
Transform your terracotta pot into a miniature koi pond with layered acrylic painting techniques.
This technique changes a plain terracotta pot into a miniature water garden. Painted flower pots featuring a koi pond become instant conversation pieces for your patio or windowsill.
I start by coating the bottom third of terracotta pots with tan acrylic paint. This forms the pond base. I sketch my koi pond scene lightly with pencil before committing to color.
I paint koi fish in orange, white, and gold on light backgrounds. The fish stand out against white or pale painted flower pots. I add fins, eyes, and ripple lines after the base coat dries.
I include lily pads, smooth stones, and reeds around the fish. These details ground the scene in reality.
I seal the finished piece with clear acrylic spray. This protects my work from rain and sun damage for outdoor display.
Add Chalkboard Bands for Reusable Plant Labels
How do you keep track of what’s growing when your plants keep changing? I paint chalkboard bands on my pots. These reusable labels let me erase and rewrite as my garden shifts.
Here’s how I make them work:
- Paint the Band: Apply two coats of chalkboard paint in a 2-inch ring around the pot.
- Seal the Surface: Brush on matte topcoat to stop chips and wear.
- Write with Care: Use chalk markers for plant labels that stay readable in sun.
- Refresh Seasonally: Wipe clean and relabel for new herbs or flowers.
I match my chalkboard bands to each pot’s base color. Metallics add contrast if I want a sharper look. These reusable labels remove the need for tags that fade or fall.
Seal Your Painted Flower Pots for Outdoor Use
Where do painted pots fail first? The finish cracks. Water seeps in. Paint peels within weeks.
Painted pots fail where water finds a way in—through cracks, through peeling, through time.
Protect Your Work
Use painter’s tape to mask areas you don’t want to coat. I apply exterior sealant to all terracotta pots that sit outside. This step prevents chipping and stops weather damage cold.
Pick the Right Product
I choose sealant labeled for exterior use and acrylic compatibility. I let paint cure 24 to 72 hours before sealing. Temperature and humidity affect drying time.
Apply with Care
I prefer water-based polycrylic over solvent-based types. Odor stays low. Indoor air stays cleaner near windows.
Maintain the Shield
I reapply sealant after heavy rain or intense sun exposure. Color vibrancy lasts longer. Terracotta stays protected through every season.





